Color Photography with the Leica M Monochrom
By Richard Greenstone
When the Leica M Monochrom was introduced in May 2012 I knew that I had to acquire one for my photography. Perversely, two contradictory thoughts occurred to me. First, the Monochrom would provide a nearly unlimited “roll” of black and white film–something I have dreamed of since starting photography when I was thirteen years old in the late 1960s. Second, and more strangely, how could I make a color photograph using the Monochrom?
Some backstory is important (to me) in telling this story. My first real camera was a Leica IIIF which my father acquired while serving in the U.S. Army during the Korea conflict. Some seventeen years after he purchased the camera, I “inherited” it when he transitioned to a Nikon F. I still have the camera (which has a 50mm f 2.0 Summitar lens) and later acquired a second IIIF (with self timer) which I also still have. I bulk loaded Plus-X and Tri-X for years with my Watson bulk loader. In high school and then in college I started using a 4 x 5″ view camera. I used it primarily during my college years, first at University of Oregon, and then for a semester at Art Center College of Design in Los Angeles (and left that school quite voluntarily after one semester), worked as a professional photographer, before taking the odd turn into intellectual property law.
[ad#Adsense Blog Sq Embed Image]
I eventually settled on three cameras: a Leica MP, a Mamiya 7ii, a Hasselblad 500cx. I shot black and white and color (probably an eight to one ratio in favor of black and white) and only managed to adapt into the digital world by scanning my work and then using Photoshop. I had a strange detour into digital early on with a Nikon D1 which I stopped using as it fell apart! Horrible camera. I continued to shoot film exclusively (outside of the usual iPhone photos) until I acquired the Monochrom.
The history of photography is replete with attempts at making color photographs. Each method, from James Clerk Maxwell to Leopold Mannes and Leopold Godowsky, Jr., (musicians and developers of Kodachrome) through the latest digital processes, rely on basic physical principles and utilize red, green, and blue filters or layers to reproduce color. The Bayer array invented by Bryce Bayer at Eastman Kodak is but one example.
I’m perfectly aware of the limitations of using a Monochrom to produce color photographs. First, it’s got to be a still life or scenic without much movement unless being used for some special effect. Second, it’s just plain inconvenient. Let’s face it. Changing filters for the actual photography, and then using Photoshop to combine the images with corresponding color overlays is not as easy as using a camera designed for color, i.e., every other camera available save for the Red Epic-X (or -M) Monochrome.
The advantages of using the Monochrom seem to outweigh the limitations. Rather than parsing out the photograph into thousands of tiny mosaic pieces (hence the need for de-mosaicing software and anti-aliasing filters), the combination of three sharp and detailed Monochrom files accomplished in Photoshop might yield acceptable results. It also may provide an alternative technique to photographers. Another advantage may be the ability to “cross-process” by using a red filter (for example) and pairing it with the blue overlay from Photoshop. We’ll have to save that for another day. From a personal perspective, and in a sense counter to the purpose of a Leica camera, using a tripod and slowing down to truly consider a photograph may provide unexpected benefits. I’m still, in every sense of term, a medium if not large format photographer. I think that the Monochrom will certainly itch that scratch. It seems more like a medium format camera given the obvious qualitative .dng files.
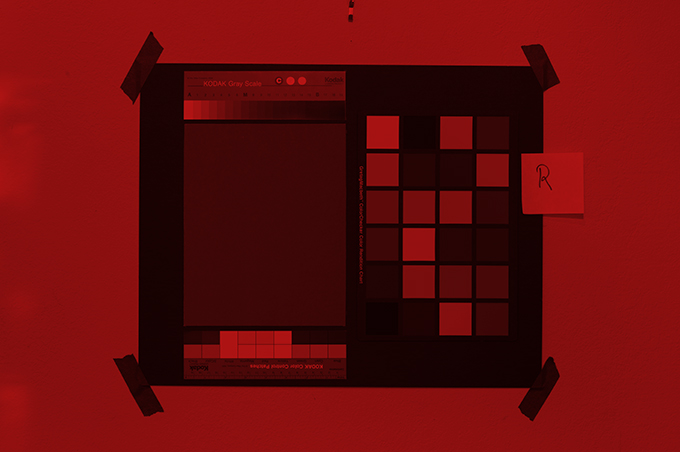
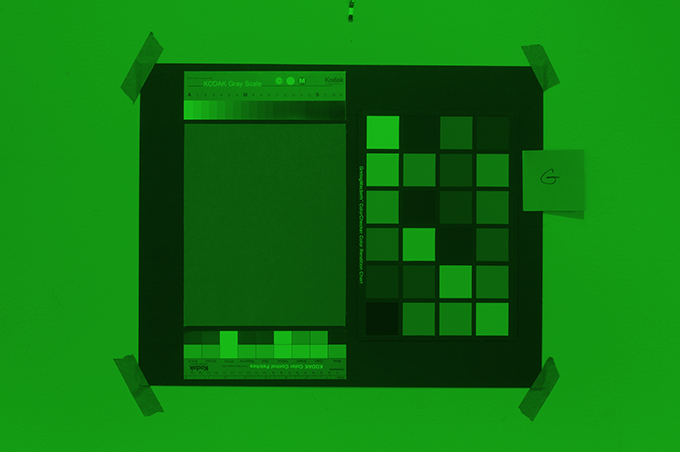
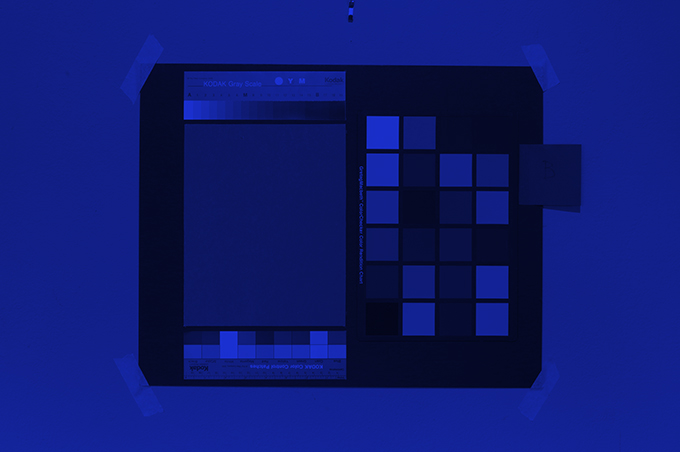
Process: I needed to acquire two of the three filters for this experiment. I possessed a No. 25 red tricolor Wratten gelatin filter for use with my view camera. I purchased a No. 58 green Wratten filter and a No. 47 deep blue Wratten gelatin filter. These struck me as the closest to typical red, green, and blue filters. The biggest question in my mind revolves around exposure. Should I photograph each color channel at normal exposure with filter factor compensation determined by the in-camera light meter or manually meter and compensate with the appropriate filter factors. I could not find filter factors for the No. 47 and No. 58 filters. I would have to rely on the Monochrom internal light meter due to the lack of available information, but more for its accuracy and simplicity. For my first batch of pictures using a test target, I used a three-shot sequence with -1/Normal/+1 bracketing.
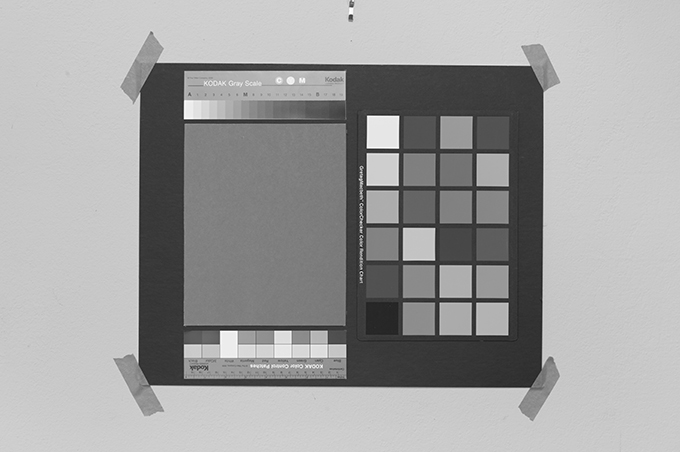
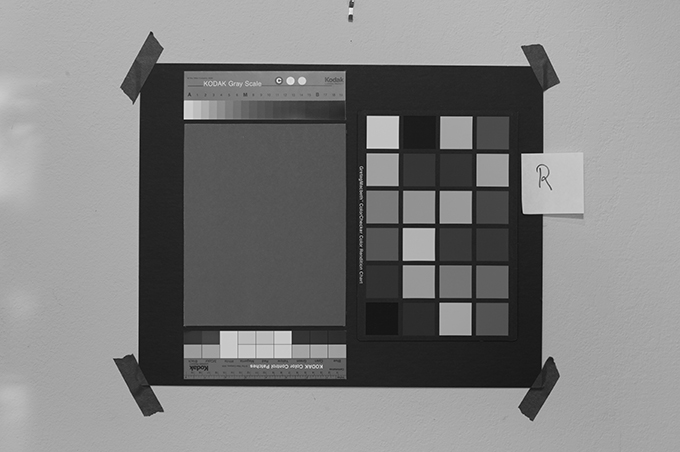
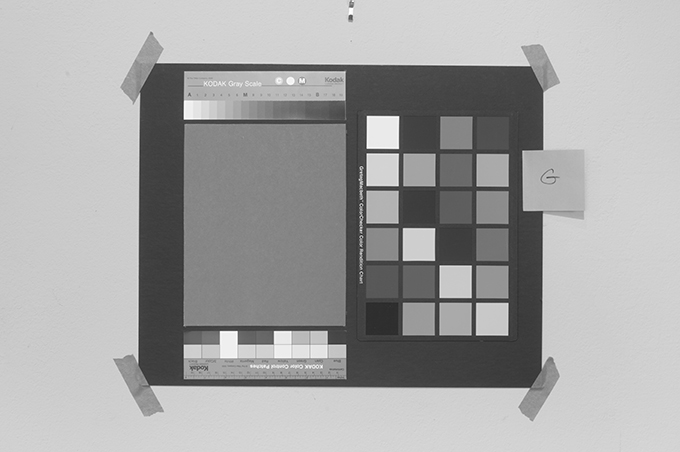
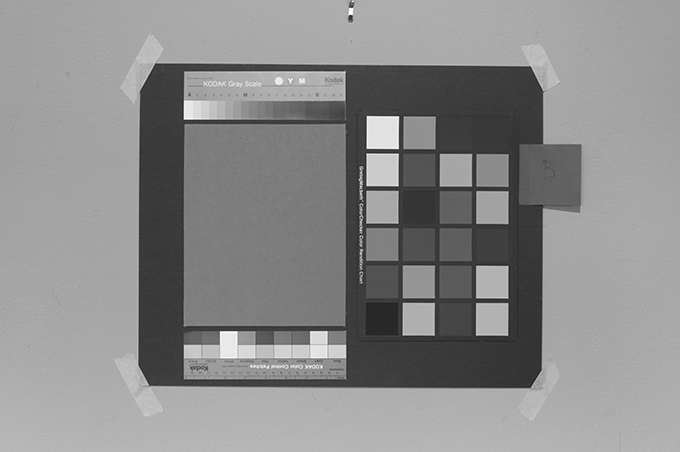
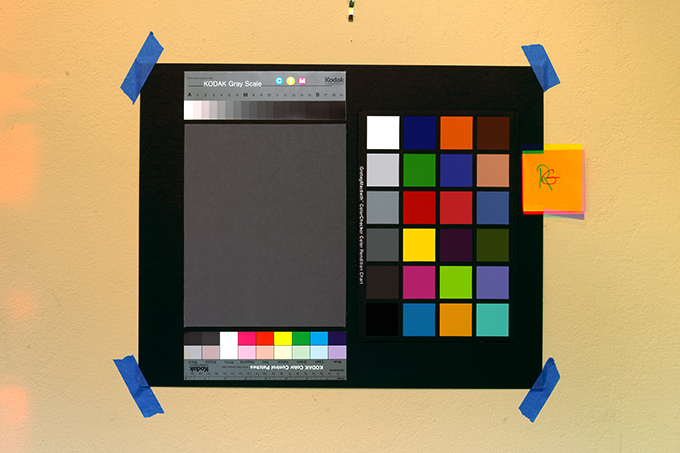
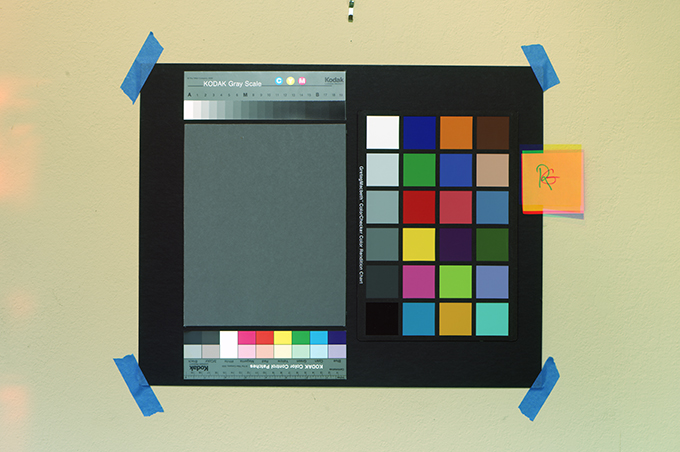
My test set up includes a Kodak Gray Scale, 18% reflectance gray card, Kodak Color Control Patches, and a GretagMacbeth ColorChecker Color Rendition Chart all mounted on one black mount board. All four seem like overkill but they yield different information.
I first shot a set of three exposures without filters. I then shot three exposure sequences with the No. 25 red, No. 58 green and No. 47 blue filters. For all the tests, I always shot and processed in a nofilter-red-green-blue sequence in order to simplify tracking of files.
As I don’t have studio lights, I used 5000K Solux bulbs from my living room for use on the test targets. This may account for some inconsistent results.
I converted each .dng file without processing in Camera Raw into Photoshop .psd files. I then changed the mode from gray-scale to RGB. For each file, I made a new adjustment layer using the photo filters. I then picked the appropriate filter, red, green, or blue, increased the density to 100% and unchecked “Preserve Luminosity.”
I found that I needed to flatten the layers for the next two alternative steps. First alternative: I used the Merge to HDR feature to receive a quick and dirty result. It worked! I tried using all combinations–the -1, normal and +1 exposures. The normal exposures worked the best. I also tried combining all nine exposures and also combing each of the -1, normal, and +1 exposures before combining the results of each of the three HDR passes. The HDR combination of normal exposures worked best. The -1 and +1 combinations looked terrible with significant issues in the neutral gray tones. The HDR combination gave me very sharp images but there were just too many issues with color rendition. Does HDR include a sharpening algorithm? The colors also looked over saturated, typical of HDR images.
Second alternative: Create the adjustment layers using the red, green, and blue filters. Take one of the layers and use it as a background or base layer. Again, I used the red layer as the base. Perform a “Save As” to the red layer to make a new file. Change the mode of the green and blue layer to “Lighten.” Do the same for the other two files. Then copy the blue and green layers to the base image. The layers should align very easily at this point (they essentially snap into place) and you will be presented with a full color photograph ready for color balancing and refinement.
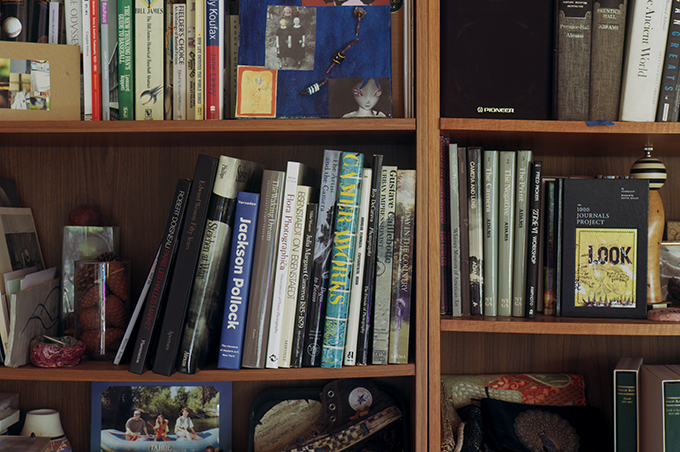
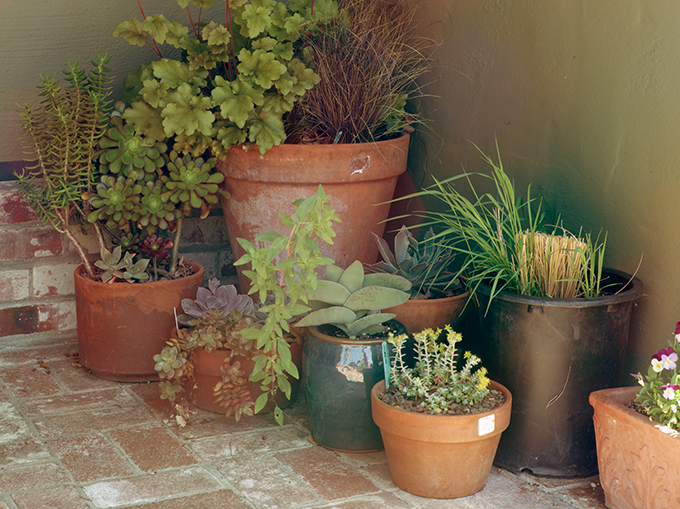
Conclusion: The Leica M Monochom for color photographs is completely possible but limited by a cumbersome process and movement issues. Stability in both the tripod and subject are key to the successful use of this process. The bookcase shows really accurate color and nice dimensionality. Perhaps some of the readers share the same passion for photobooks and recognize more than a few of them. The succulent photograph shows very uneven coloration on the wall. I can’t explain this except to note that the lower left was cropped out of the photograph because of uneven filter coverage with either the blue or red filter. Perhaps filter movement accounts for this issue.
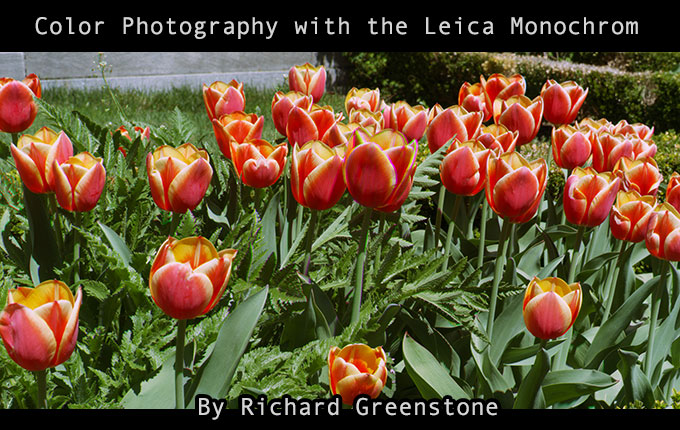
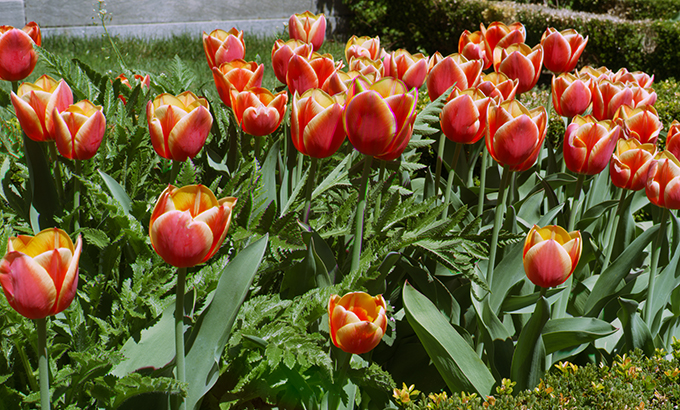
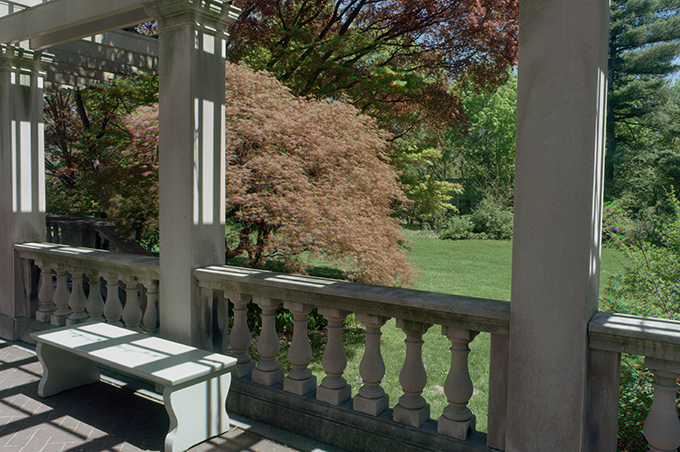
The flowers and arbor were shot at the George Eastman House in Rochester, New York. If you look closely, you can see where the flowers moved slightly leaving evidence of a three-color process. The foliage in the arbor photograph shows movement. Distributed across three pictures, the trees look out of focus, but not in a pleasing way. The thread leaf Japanese maple is very uncomfortable to look at. The arbor required the use of the -1 exposure set given the extreme contrast.
The process also requires swapping three filters so I found it best to prepare an area where I could place the filters, keep them clean, and quickly use them in R-G-B succession. A willing spouse works very well. Thanks Ramsey! Gelatin filters also mark easily and of course, make sure that tripod is locked down tight.
Contact me off list at richard@rjg.com if you would like me to send you the four normally exposed .dng files of the test target. I’d like to hear your comments and experiences, especially with other ways to manipulate Photoshop and layers. Have fun!
Copyright 2013 Richard Greenstone. All rights reserved.



The next step for Leica Monochrom 2 is to create a set of motorized rotating glass filters, which will take a snap automatically with each turn of glass, then make the repetitive task of combining the layers with in-camera software with mathematically calculated algorythms and then we can say goodbye to film.
Amazing work and thank you for your efforts!
Thanks for your post. I love it. I believe that there were some lenses (fisheye) manufactured in the ’60s (?) that had several built in filters.
tried it out myself yesterday, using not-so-suitable filters (orange, green-yellow).
a very nice excursion into colour theory, and i like the results, too. i’ll continue with my attempts.
quite surprized about the negativity that i read in some of the responses …
cheers,
sebastian
Nice! And thanks for your note off-list.
Regards,
Richard
Great work. You could have bought the regular M instead. It actually allows you to take both colour and b/w photos.;-)
Yes, of course! But I settled on the Monochrom and am happily shooting many, many more black and white than color pictures. Thanks for reading the article.
Very nice! The manual adding of color filters is exactly what came into my mind when I first heard about this camera. I would mix the color channels in a slightly different way though, and simply copy the three images into the R, G and B channels in photoshop instead of using any blending modes or such. This should keep Photoshop’s various calculations out of the way.
Have you tried other approaches than just red / green / blue filters? Like e.g. slightly “odd” colors like a more blue-violet filter instead of blue, or perhaps different wavelengths of red? (Admitted, I wouldn’t even know where to obtain such filters.)
I’ve only tried the RGB filters. But I did have the initial thought (which I briefly allude to in the article) about “cross processing” by using the blue filter image with a red filter in Photoshop, etc. Haven’t tried it. All the filters are available at B&H Photo (on the web). The three I used are considered the standard tri-color filters for making separations (at least that is how they are advertised). Many thanks for your nice comments.
Wow, this is a tedious process, however a nice read indeed. Thanks
Thank you. It takes a little time but the results are very nice for photograph that contains absolutely no movement.
How intresting, a little like Kodachrome(?). Shoot B&W with your monchrome, get film camera or ? for color. But your is just so, well intresting.
lovely lovely lovely work. the imperfections make the images more interesting and give them something “strange” “ghostly” “surreal”. please continue doing these images and don’t give a f%(/ about perfection. like early colour photography it creates something beyond simple realism and has the potential for something more interesting than simply taking another colour photo of a porch or whatever. thanks for this!
Even though the photographs don’t particularly represent my “style” of photography or my usual subject matter, the technique does give an interesting look to the pictures, especially the tulips. Thanks for your kind thoughts!
Very interesting article. Thanks for sharing.
Just so I have this straight- you spent $8000 on a B&W only camera then turned them into color images? You have too much time and money.
Well, I don’t think I have too much time, and I know I don’t have too much money, but I was curious.
Curiosity is a great and valuable gift. I makes you an interesting person. Some say the definition of a creative person is how they use something for a purpose other than what it was originally created for. You have my respect. Don’t let the trolls get you down.
I’m all smiles today. Thanks everyone for your great comments.
Richard – Not only is this very interesting, it’s a useful map for making purchasing and photography decisions. Thank you!
The Foveon company started this way.
Very nice Richard,you’ve completed a line through time ending with a very worthy recipient completing the circle.
Thanks. I appreciate that!
This is a very interesting experiment, congrats! I’m curious to see some full res files!
Matteo,
Thanks. Send me an E-mail and I’ll send the four target files to you.
There is a lens with built in RYGB flters : old Sigma 18mm f2.8.
There were a few lenses by different manufacturers with built in filters, usually in either very wide lenses or telephoto lenses.
Very reminiscent of the early color work of Prokudin-Gorskii, which I love!
http://upload.wikimedia.org/wikipedia/commons/8/87/Prokudin-Gorskii-12.jpg
Hi all, here is a stunning series of pictures taken at the early 1900… using this kind of technic. They are very touching because human is in the center of the pictures…
http://www.boston.com/bigpicture/2010/08/russia_in_color_a_century_ago.html
These are wonderful pictures. The color in the clothing is phenomenal.
A manual approach to what the Foveon sensor does. Fun experiment, but not very practical.
An excellent experiment. Some of the best astrophotographic images of space were taken entirely in B&W using 3 color filters and then converted to color for the final amazing color image.
Just like the old days using 256 grayscale scanner using 3 filters scan 3 time to make it color photo
This reminds me of the three-strip Technicolor process. A prisim split the light into three cameras running in synch with appropriate filters. You probably don’t want to buy three Monochroms but there was also a variation that had a color filter wheel that would allow the three images to be captured in sequence. Many of the early Disney cartoons used this process.
“..A prisim split the light into three cameras..” ..just the one camera and lens, but with three rolls of black-&-white film running simultaneously through the single camera: one for each primary colour. Afterwards, the projected print (shown in cinemas) was created by combining the three separate sets of images, just as Richard’s done here.
Cinema films are still “archived” this way – till digital takes over completely – by separating the filtered colours onto three silver-based black-&-white films. Colour (dye-based) film eventually fades, but by separating the colours onto non-fading silver-based b-&-w film stock, new prints can be made many years afterwards but still with the vibrancy of the original colour film.
[Incidental note: colour cinema films were dye-based except for the soundtrack, which was processed separately as a silver-based black-&-white strip down the edge: dyes wouldn’t give the accuracy and sharpness which was necessary for audio tracks. Around 2001 things changed to the cheaper method of printing the soundtrack in greenish-blue cyan dye, and putting a red lamp in the projector’s soundtrack reader, to achieve similar contrast – and thus clarity – as using black-&-white soundtracks. But we’ve now moved to digital projection – from digital files – instead of using image-based film.]
Richard,
This is quite interesting study of color. I wonder if you could duplicate the two color Technicolor process like in the Aviator.
Pete
The color wheel of a “Polaroid Pallette” would probably work, it was a three pass color film recorder that used a high-resolution monochrome CRT. 1980s.
The Kodak DCS200m had a color wheel available for it, made three successive images in Red/Green/Blue. This was available in 1992.
There is an article on this subject (when I searched on Google for “Kodak DCS200m”). See “Analysis of Multispectral Image Capture” by Peter D Burns and Roy S. Berns, published in 1996. Very cool!
Here’s the URL for the article:
http://www.google.com/url?sa=t&rct=j&q=&esrc=s&source=web&cd=1&ved=0CC8QFjAA&url=http%3A%2F%2Fciteseerx.ist.psu.edu%2Fviewdoc%2Fdownload%3Fdoi%3D10.1.1.148.8077%26rep%3Drep1%26type%3Dpdf&ei=AfujUZPxLuO1igLtzoD4BQ&usg=AFQjCNGv945DQlH7_OYXFXcfzYo3gNo0Cw&sig2=_o_anckytXWV_o77ZHqMog&bvm=bv.47008514,d.cGE
Wow, this seems like you have essentially created the equivalent of a Foveon sensor – each photocyte captures three channels. If you use the process Jeff describes above, the concept may yield a picture with more information than an equivalent Foveon sensor. What a great idea!
Very very cool!
Awesome! Very interesting, thank you!
Richard- thanks for the write up it was fascinating. The results are way better than i would have expected. Glad you love the Mono it is a fantastic creation.
All the best for future tests.
Rich
Thanks!
This is a very interesting article from a technical viewpoint…cool to see that you could do this. Of course from a practical point of view it’s rather useless as the process is completely counter to the point of shooting an M…simplicity.
That said, I’m always amazed by people’s ingenuity, well done!
Clint,
I’ve always embraced simplicity and the quest for simplicity certainly delayed my entry into digital photography. Every time a friend purchased a digital camera and asked for help, I cringed at the 200+ page user manuals. Notwithstanding my quest for simplicity, I just had to give this process a go. It was a lot of fun.
Jeff,
Thanks for your great comments. I don’t have much of a science background so I relied more on my knowledge of the art history of photography. Can you give us some examples of narrow bandpass filters? I’m interested.
I’m familiar mainly with just the astronomical filters, although of course they can be used for any purpose. They are not cheap!
http://www.astrodon.com/products/filters/e-series/
http://www.customscientific.com/astronomy.html
Interesting article, but this could be improved with the correct filters and a better combination technique. I used to do a lot of color astrophotography using this methodology. The best astrophotography work is done using a monochrome sensor and color filters; I was using this technique as far back as 1996 with a tiny 512×512 sensor and by early 2004 I was using an 11-megapixel Kodak sensor that was full-frame 35mm size. I did a little terrestrial color photography with this setup as well.
The best way to to get accurate color is to use narrow bandpass filters so you don’t get cross-contamination of the color channels. The CFA on the sensor is built this way. The advantage of this technique is stunning resolution, although the author is correct to point out that you can’t shoot moving subjects. Still, getting an image that is roughly the equivalent of a 50-megapixel camera is amazing.
Ideally you should shoot one image that is pure monochrome. This will become the luminance image. It’s unfiltered. Then shoot each of the colors, and ideally normalize the exposures. This takes some time to calculate the exact matching exposures such that the relative ratios of signal to noise are close to identical. This is necessary because CCD sensors are not equally sensitive to all wavelengths of light. Generally they are most sensitive to red, then green, then blue. The relative sensitivity to blue light can be as much as a half that of red, meaning you could have to double the exposure through the blue filter. This is in essence what the author did by calculating the filter factors.
Once you have the four exposures, they can be assembled in Photoshop as an LRGB image. The unfiltered image is the luminance layer, and each color is then properly assigned to the RGB color channels. If the filter factors were properly calculated and the camera was stationary for the exposure, the final result should be a very accurate and sharp full color image.
BTW, using narrow bandpass filters helps compensate for issues with angular attenuation with an absorption-type filter–off axis an absorption filter will start to shift colors a bit. Unfortunately, large narrowband filters are quite expensive!
…And in the old days we took colour transparencies and for editorial work a number of screened colour separations were made using colour filters in very expensive repro cameras. (I Think one Nikon process used six separations.) Then each image was printed using the appropriate colour ink in the designated image area after very careful registration and together these built up to make the colour image in the magazine…. get one out of alignment and everything is ruined…… it is a crazy world!
But didn’t some of the early high end digital cameras rely on a four shot system through different filters which was then combined… Having built the MM for just B&W this project must have the designers at Leica scratching their heads…
It’s reminiscent of creating color from B&W using dye transfer process.
Yes! It just seemed that using Photoshop would simplify the entire process.
That’s pretty amazing, I read about it a long ago, but couldn’t really test it, since I don’t own a MM…
Seriously, major props for that.
Thanks!
Great post.! I knew this could be done but as you mentioned, seems like a lot of work.
Thanks! It was a lot of fun to figure out.