HOW TO: Wide Field Astrophotography With a Camera and Tripod
Shooting with the Sony RX1 and Olympus OM-D
By Chris Malikoff
Hi Steve, I’ve been enjoying your site now for some time. Your reviews helped me change my mind about my heavy DSLRs, and as a consequence, I’ve bought into the Micro Four Thirds system with an OM-D. I couldn’t be happier. Recently, I’ve gone and taken the plunge and bought a Sony RX1 based on your reviews as well. Perfect!
Having now dropped my Canon 5D Mark-II and 40D, I thought that my astrophotography hobby was probably over. It’s pretty-well accepted within the general astro community that if you don’t use a high-end Canon you should forget it. Astrophotography needs cameras with super-sensitive sensors that display great high ISO performance and very low noise characteristics. None of the mirror less cameras are ready, say the pundits. I say, in response, not true.
[ad#Adsense Blog Sq Embed Image]
1) What We’re After
The secret of taking decent wide field photographs of our night sky is TIME, and lots of it. You need to expose your sensor to very feint light coming in through your lens’ aperture and let the sensor wells soak up as many photons as possible before writing the data out to the processor and on to your memory stick as an image. The only way to do this is by employing bulb mode and letting the camera sit there for up to tens of minutes at a time – depending on your intended object or part of the sky. Throwing a spanner in the works, unfortunately, is this little problem we have with the sky at night. It, and everything it contains, seems to revolve around us as the Earth spins underneath it on its 23 degree axis once every 24 hours. This poses a curious problem to the average photographer – how long can I expose an image for before the stars and my brighter objects, such as “emission” nebulae, start to show blurred trails in the photo instead of presenting a nice clear image? This depends on a number of factors.
2) The Problem
First: The quality of your overhead sky really matters, especially down near the horizon if you want to incorporate a foreground in your shots. By this, I mean that the more light pollution there is in your neck of the woods, and as a consequence your contrast ratio is low. This means that in city areas the night sky is so bright from light reflected off the ground due street and other lights, that you’ll have almost no stars in view let alone the lovely wisps and gaseous tendrils of something as beautiful as the Great Orion Nebula or band of the Milky Way. From a location that suffers from a brightly-lit sky, you can’t expose for long periods of time because you’ll only get a washed-out white mess as a result. The tip is to get into your car and drive away from the city – as far as you can. Typically, I use a 100 kilometre (60 mile) rule that says you should be no closer to a city than this to see an “acceptably darkish” night sky in order to obtain a decent result. The further, the better. I’m lucky here in Australia – we have a lot of room. In the southern hemisphere we also have an advantage over our northern cousins in that our position on Earth lets us look in towards the galactic centre of our Milky Way galaxy, rather than seeing out towards the thinner edge. This means that our Milky Way is generally brighter than that which you get to see in the north.
Second: The moon is your enemy. Depending on what part of its cycle it’s at, it can range from nothing at all because it’s below the horizon, a dim sliver of light to a full-blown angry ball of white light. A full moon simply paints the atmosphere in visible white light that, like the previous point, serves to wash you out. Download a moon calendar app for your mobile device or computer which can show you what nights the moon is at its lowest output – and the best is when it’s not around. This is called the “new moon”. This phase lasts for two or three days every month. You really,really need to try astrophotography on these nights to get a good result. The moon is pretty – but it kills your chances of capturing decent photos of the night sky.
Third: The Earth’s rotation. Herein lies a choice you need to make, as you can take two distinctly different types of image of the same night sky.
3) Type of Image – Your Choice
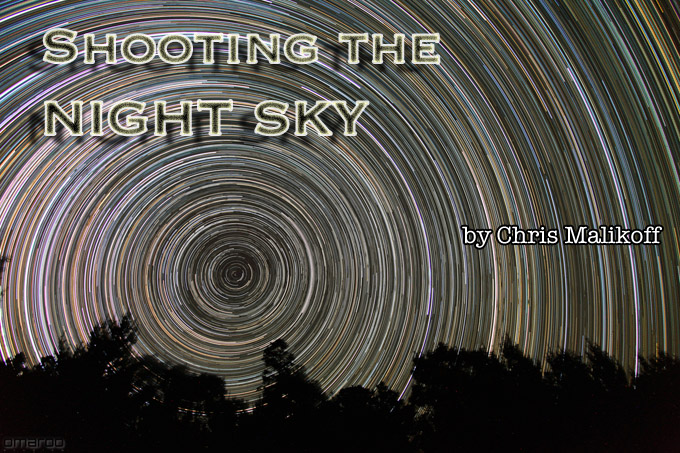
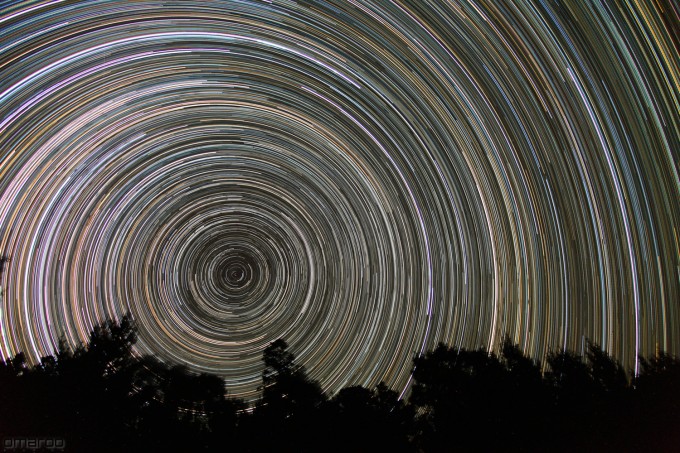
The first, and most common images taken by astrophotographers, are of star trails. All you need is a statically positioned tripod and a camera fitted with a remote release or intervalometer to give you long (one minute) exposures. Simply point the camera towards either the north or south pole, depending what hemisphere you’re in, and watch as long trails of light start to appear in your images as the Earth rotates. Bright stars literally draw circular lines of coloured light on your sensor or film as they move around your local celestial pole within frame. There is freeware available called “StarTrails” that lets you stack these one minute images together which joins the sixty-second trails together into a circular mass of lines. These are great images, but they’re not what I’m after.
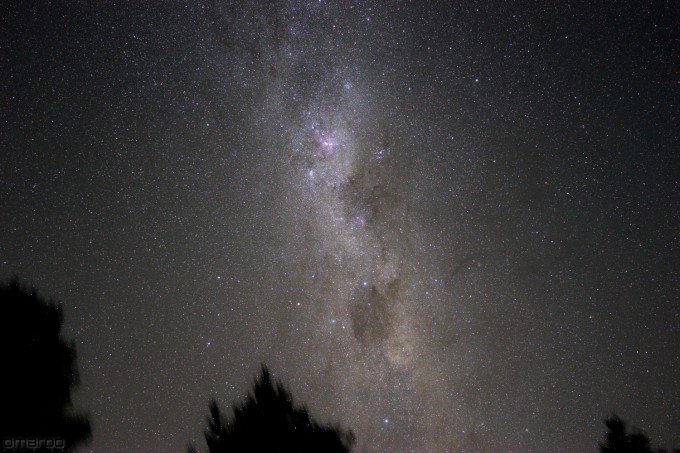
I prefer to see a still set of stars that show the bright patches of iridescent gas that burns as nebulae in between. To do this, you need to be able to counter the Earth’s rotation by moving your camera’s lens around the pole at what is termed the “sidereal” rate. By mounting the camera on a device who’s rotating axis is pointed directly at your local celestial pole, and that rotates in the opposite direction to the Earth’s spin at EXACTLY the same rate, you can “hold” the night sky still. This device is known as an “equatorial” mount. Normally, a decent computerised equatorial mount will set you back many hundreds or even tens of thousands of dollars. These are designed to carry a telescope payload that may or may not include a camera mounted at “prime” focus on the telescope. By using an equatorial (EQ) mount to place your camera and lens combination alone on, one can shoot the same patch of sky, literally all night, depending on the quality of the mount and how well it’s been aligned to the celestial pole in your region. There are usually, and necessarily, complex procedures involved in “polar alignment” that would take a few pages to explain. Unless your system is perfectly aligned with the pole, you will never see round stars appear in your long exposure images. Fact of life – nothing you can do except do the work.
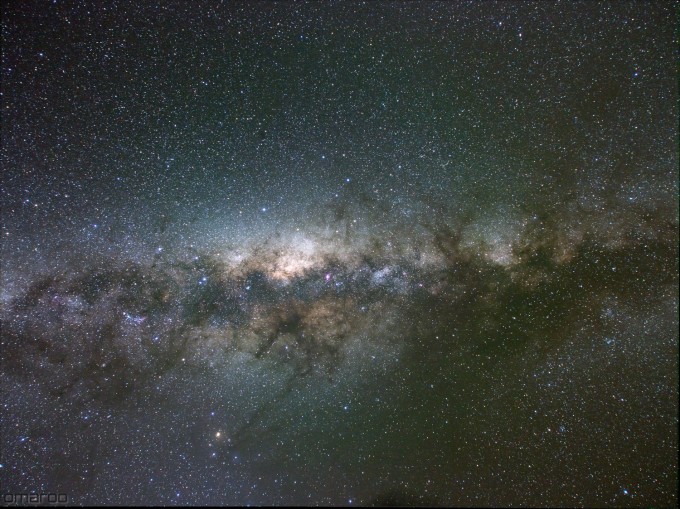
Sony RX1 – 518 Seconds – f/4 – ISO 800
4) The Equipment
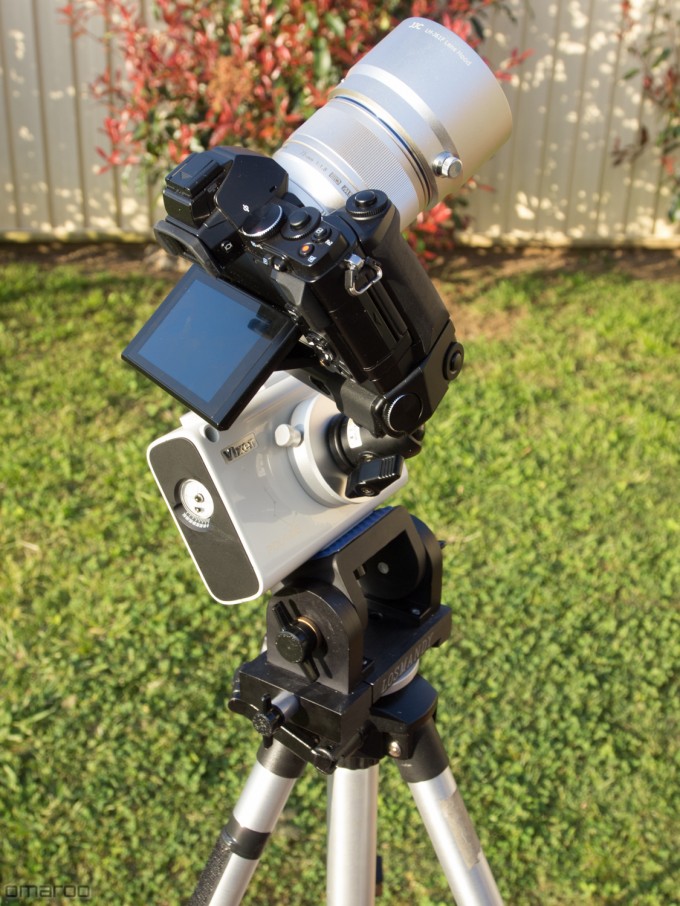
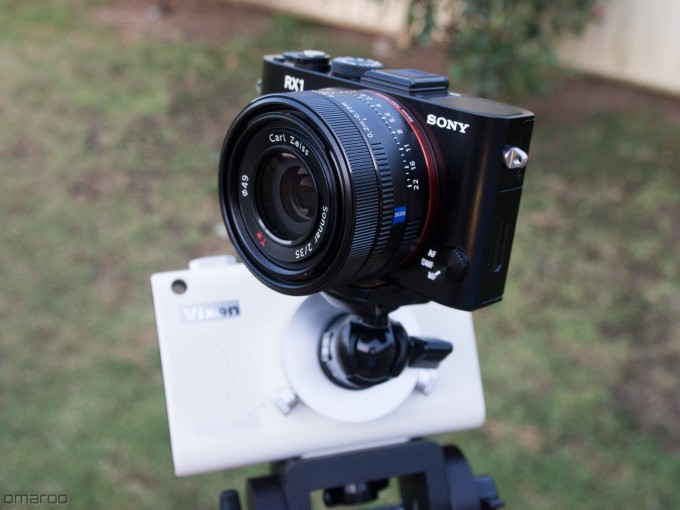
OK – so I don’t have a gazillion dollars to throw at a full-blown telescope EQ mount, but still want to take photos of the night sky without any star trails in evidence. Answer – purchase a portable EQ mount designed to sit on a common tripod. There are several varieties and brands available, and these are a fairly recent addition to the astrophotographer’s tool kit. They range in price from three hundreds-odd dollars to just over a thousand if you buy all the options. The unit I chose is called the Vixen “Polarie” – made in Japan by Vixen – a long-time supplier of premium telescopes and mounts. The Polarie will set you back around the $400-500 mark, depending on where you are. Others are “AstroTrac (UK) for just a little more, and the new iOptron SkyTracker which will cost you a fair bit less. Quality differs, but they’ll all do the same thing in the end – spin your camera around your polar axis.
Vixen: http://www.vixenoptics.com/mounts/polarie.html
AstroTrac: http://www.astrotrac.com
iOptron: http://www.ioptron.com/index.cfm?select=productdetails&phid=0193c9ab-b455-4fb1-9534-ef192192a93f
Olympus OM-D on the Vixen Polarie
and the RX1…
Once you have attached your chosen device to the top of your tripod using a geared head or very solid ball mount, you need to do two things. You must point it in the right direction relative to the horizon, and then you’ll need to point it up into the sky to the right elevation so that the central rotating axis of the unit is pointing as close to either the north or south celestial pole depending where you live. In the north – you have it easy. All you need to do is find the Pole Star, Polaris. (http://en.wikipedia.org/wiki/Polaris) This star is easy to find and closely marks the north celestial pole. All you need to do, with the Polarie for example, is use the sight tube built into the casing of the unit to sight this star through it. Lock your ball or geared head. Mount the camera and lens to the front of the unit on a second ball mount and point your camera to where you want to start shooting. Fire away. If you live in the south, as I do, then it’s a little more difficult. There is no star handily pointing out your local pole. You can use the optional “polar scope” to fine-tune which way you’re pointing after you use a compass (set to point to true south, not magnetic) and inclinometer (angle meter) to set the square faces of the unit in the right direction. If you’re in the south, then you have to know what your position’s latitude is, and use this to set the inclinometer so that you point high enough off the horizon to see the pole. I live in Sydney, which has a latitude of 34 degrees south. I set my inclinometer to 34 degrees and then set it against the front face of the Polarie so the it tilts back at 34 degrees. Then use the compass to point the front of the unit to true south. To do this you’ll need to know what the offset from magnetic south is for your area – it differs greatly depending on where you are. Use your smart phone and set it to show true, rather than magnetic south and it’ll work it our for you.
Olympus OM-D
OK – so we’re nearly there. You now have your EQ mount sitting on your tripod and its main axis is pointing at your local pole. You’ve mounted your camera on the rotating front ring and it’s pointed somewhere interesting in the night sky that you’d like to photograph. What next? You need to set up your camera and decide on a field of view. Tip: The shorter the focal length, the wider the image and consequently the less critical your tracking needs to be. The longer the lens, the more critical your tracking is. My ideal length falls in the range 24mm to 50mm. Any longer and it’s starting to be a world of pain. Don’t be tempted to stick a 300mm tele on, because unless you have one of those huge telescope-grade EQ mounts, you’re going to end up with fuzzy, out of round stars. There is a weight limit on these small EQ mounts of around 2.5kg (6-7lb).
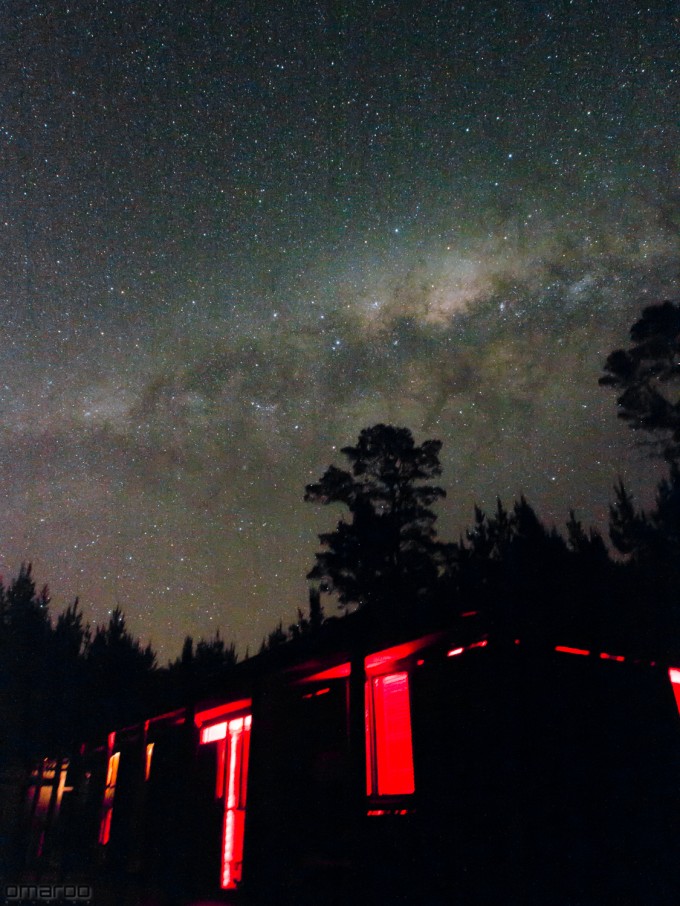
Olympus OM-D – 304 Seconds – f/5.6 – ISO 400 – 24mm
5) Set up your Camera
Deep-sky wide field photos require exposure time. A few seconds simply doesn’t do it. You’ll capture a few of the brighter stars, but that’s all. You need to take exposures of two, three, five and even seven or eight minutes to get the “fluffy” stuff. Set, as a starting point, place your camera in full manual mode.
A) Focus: Set your ISO to 1600 or higher if you can. This is only temporary, and is needed to show you stars as bright as you can possibly see them in live view if you have it. Set your lens to manual focus. If you don’t have live view, set your focus to infinity as a starting point. With live view, you should be able to see these stars with your focus set to infinity. Adjust focus with live view’s zoom feature set to as close in as you can get. Canon gives you 10x, if you run an OM-D it’s 14x. You’ll see the star focus to a sharp point, with it becoming a soft disk either side of proper focus. Take it out of live view. Take a 10 second exposure. You should see sharp stars in your image.
B) Set your aperture to around f/2.8 – either via the lens or from a menu if it’s entirely electronic and fly by wire. Fast lenses are good here, as long as you don’t open them right up as you’ll start to see vignetting and/or spherical aberration creeping in. Stop it down a stop or two and just expose for longer. If you have a slower lens then don’t panic – time will fix it. I have an old f/4.5 tele that I use regularly and it works beautifully.
C) Switch on your EQ mount so that it starts moving at sidereal (star) rate – not lunar or any other rate that you may have on the dial.
C) Take a 30 second exposure. If you see round stars and no obvious trailing, then you’re good to go.
D) Now set your ISO value to around 400. Turn on ICNR (In-Camera Noise Reduction). This will help mitigate thermal noise in your image.
E) Set your exposure to 30 seconds and see what you get. If your camera can expose for longer than 30 seconds, like the OM-D at 60 seconds, try that. The OM-D’s brilliant “LiveTime” feature is phenomenal here. It will let you start exposing and you simply watch the image form on-screen in real-time. Brilliant for this job.
F) Now step up your exposures (if you don’t have LiveTime) to 60 seconds and beyond, with a cable or remote electronic intervalometer or release. I’ve managed 15 minute exposures with this setup, but you need REALLY dark skies to pull this off. Otherwise, you’ll start to get white-outs. Speaking of which, if you start to see this, simply decrease your ISO, step down the aperture another stop or two or reduct the exposure time. You’ll find a balance.
6) Final
Once you have a bunch of successive images of the same area, you can use any number of stacking programs, including Photoshop CS4 or newer, to stack them which results in better signal to noise ratio. This means that, by averaging-out the noise between stacked images, that you can push the levels of the image to increase the dynamic range – and suddenly your images will start to pop. That’s an entirely different subject for a different day.
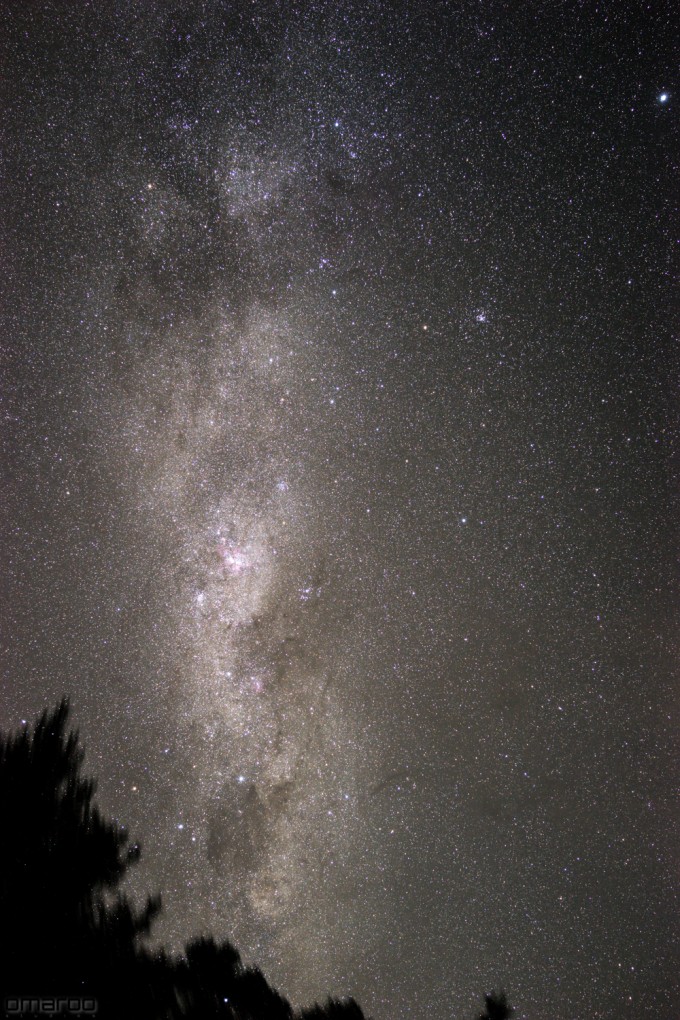
Sony RX1 – 446 Seconds – f/4 – ISO 800
Have fun – and post your images somewhere where we can all see them.
Cheers
Chris Malikoff
Sydney, Australia



Chris, how did you get the 446s exposure on RX1. Was it bulb mode with mechanical shutter release?
Chris, how did you get the 446s on the RX1.
Was it by stacking 30s images or bulb mode? Mechanical shutter release?
Are there any filters, Cokin or some such, that help capturing a better image for astrophotgraphy?
Great article!! I know it has been a while since you wrote it, but hope you or someone else monitor it. I have a question; How about many more shorter exposures vs a few longer ones? I know if you depending on focal length keep exposure under x seconds, you can avoid star trails without an eq mount. I have also heard of people using even video, and stack 1000s of video frames. Is this not an alternative for wide-field(say, either using 4k video, or at least maybe 100+ frames from raw photos)?
Thanks!
Great article Chris. Covered all the details in an informative way. Great pictures to help explain everything too.
Mate this was the best of the 10,000 articles I read and made it so easy to understand. Now its a case of putting it into action. I just had a Polaris and scope turn up so here hoping I get it right. I am in Brissy and plan to head out 100km plus and have a crack within the month.
Chris,
I have started in astrophotography using my Meade LX 90 but dismantling the beast and hauling it more than 80 miles away to get decent skies ( I live near Los Angeles by the coast) is a bear and does not really let me enjoy. I have been indecisive on buying a light sidereal tracker and just use my camera (Nikon D300S) but was not sure how all was going to turn out. Your article has put me over the line….best I have read on the subject…thank you very much for taking the time to create and post. If this excellent article, according to your account, reads as if it was written at midnight and very tired, I suggest you keep on writing at these times.
Thank you again.
Amazing.
Excellent article! It would be great if you could expand on it (a sequel?) and discuss full spectrum/astro modified cameras, good filters etc.
Thanks Josh, James and Michael. 🙂
James – come back and photograph it! 🙂
Michael – South Africa is stunning. I’ve been there many times to both sides of the country. I worked on assignment out of Midrand and visited Cape and P.E. regularly. Heading up into the mountains will certainly elevate you above the muck, at least. All large observatories are on mountain tops for a reason – the “seeing” is better. If you can find a spot where the Milky Way is visible, and it is in a direction opposite to the nearest city you could have some good success 🙂
Outstanding post Chris, thank you, oh and inspirational photos too by the way. I live in Europe where we’re presented with the additional challenge (other than the lack of space between towns) of dealing with predominantly overcast or hazy skies due to the relatively wetter weather over here. Relative I say, as having lived most of my life in the Southern hemisphere too (South Africa) I can still vividly recall the pitch black, seemingly 180 deg. wide, star filled skies of the Karoo – even on moonless nights one could still pretty much walk around at night without stumbling into boulders or bushes, it was remarkable. Nontheless your post has inspired me to get out anyway (once the current inclement weather has cleared a bit) and try put your teachings into practice. I’m thinking heading “up” might be a possible solution to our local handicaps and by that I mean into the local mountains. Your alluded to future articles on the subject matter would be greatly appreciated. Thank you again.
Chris,
Thanks for such an awesome article! I have always wanted to try this but didn’t know how. I was inspired when I went to central Australia and saw the night sky truly for the very first time. Now I have another reason to go back. Your images are really great.
Uh… I’ll stick to street photography 🙂 No, but seriously, great article!
Thanks Habs, Gary, Thien and Joergen – I really appreciate your comments 🙂 I might do another article soon purely on the polar alignment phase for both northern and southern hemispheres.
Thanks for one of the best articles I’ve ever read on this subject and photography in general.
This is just an incredible article that I will definitely revisit should I ever have enough money to purchase an EQ mount. Those images are just absolutely stunning.
This is a terrific tutorial. Thanks so much for taking the time to assemble this information!
Great article. Thanks for sharing!
Hi Chris,
Really loved the article, was hoping for some info like this ever since I posted your wonderful shot on the RX1 Files tumblr.
Question: you mention that we should be a 100km from the nearest city to get reasonably good results. I’m living in a tiny country (Belgium) where you can never be further away from a city than 20km. We have a very dense population. Would you say it’s impossible to get good results here? I’m very keen on trying it out, but before I buy any gear I’d need to know if I can still do it here, or only when on vacation 🙂
Thanks!
Thanks so much Olivier 🙂 Golly – 20km? Wow…. we have hundreds and even thousands of km between some towns and settlements here. It’s difficult to relate to that density for me. LOL
Hmmm… if you were to have any chance of obtaining great shots under those conditions, at least try to find a couple of small towns to sit between. Smaller towns tend to shut down more lighting at night than larger ones, with car dealerships and malls that are lit up for people to see from space. If you wait for the new moon and early morning (2:00am-ish) you might get some decent sky near zenith – i.e. straight up. I doubt that you’ll see clear horizons because of the proximity to the nearest town, and the light dome from it will interfere with your shot.
It’s not as though it can’t be done – I even shoot from my Sydney suburban back yard, and it certainly isn’t completely dark there I can tell you.
If you ever go to outback Australia, Alaska or any other expansive country area, you won’t know the night sky. It will blow you away.:)
Totally amazing pics and great article. Thanks for telling me about Live
Time on my OMD! I did not even know such a feature existed. Now I really want to try it out.
Excellent Steven 🙂 LiveTime is just fantastic. I wish all cameras had it.
Again, thanks everyone for your interest. Astrophotography is a great hobby, and as photographers, you’re eminently qualified to give it a go and see quick results!
Hey Chris,
Thanks so much for this I was just thinking about trying out this type of photography now you’ve answered every question I had and some I didn’t know to ask. Well done and great shots thanks for the inspiring read.
Thanks! These are such lovely images – they almost make me wish I didn’t live in the middle of San Francisco, where most nights I can’t see any stars. It’s wonderful that such powerful images can be made with modest equipment accessible to many.
Hi, this is one of the most clear and understandable articles I have read about astrophotography. It really is a great help. I have one question though, is there a way to avoid getting those red hot or blue pixels even with in-camrea noise reduction turned on?
Thank you kind sir. Hot pixels are going to appear in almost any camera. Also, the warmer the ambient air temperature – the more thermal noise (as opposed to dropped pixels) you’ll get too. More modern cameras seem to be better in this regard, and I haven’t seen any spurious red or blue pixels in either the RX1’s or OM-D’s images yet. If you do suffer them, however (like I used to on my old Nikon D200), taking several images in a row and then stacking them tends to help a lot here. The stacking algorithm will negate these at it averages out like pixel addresses that are different from frame to frame. Hope that helps 🙂
Thanks man. More power to you!
Thanks everyone for your kind comments! 🙂 I read the article back to myself this morning (Sydney time) and realise that it reads a little like it was written very late at night on no sleep. It was! 🙂 Apologies for the obvious typos.
I’d be very interested to know if anyone of you try this. It’s a great night out under a brightly-lit sky in a dark location. If you can find some interesting foreground features you can also include these in your image. In reference to the Polarie, (I don’t know about the others) you can set the tracking rate to “1/2”, and this will reduce the tracking rate to half sidereal. This will let you expose for a while, and whilst not quite keeping up with the rotation of the star field, you aren’t exposing your foreground while the mount is moving quite so fast either. This means that rather than keeping up with the sky and necessarily blurring the foreground, you get an average.
Great write up!
Thnaks Chris! Fascinating article and great tips.
Question It appears you need to have two tripod heads for this to work; one between the camera and EQ mount, and a second between the EQ mount and tripod…is this correct?
Yes, that’s correct Tim. One to hold the actual Polarie a the correct angle relative to level ground and the other to be able to articulate the camera off the drive drum.
Excellent intro to Astrophotography! I wonder how these long-exposure files from a Pentax K-5 or the upcoming Fuji X100S would look, in terms of noise and sharpness.
Thanks Steve 🙂 Pretty-well all recent (last year or so) cameras are going to have more than adequate performance to do this sort of photography. High ISO characteristics of new cameras means that almost any will do. I’m even going to give my little Sony RX100 compact a run soon. I just have to build a servo mechanism to hold the shutter button down in bulb mode. LOL 🙂 The Pentax K5 – doesn’t it function with their O-GPS1 unit that lets you track stars anyway – with an EQ mount? Check it out – it may!
Back in the day, we used to hypersensitize our films to try to reduce the amount of reciprocity failure…fiddly and expensive. Another approach was to use a “cold camera” where dry ice cooled the film which also limited reciprocity failure. Astrophotography today is simple by comparison. Try it, the results can be stunning!
Hi Tom – and cheers. 🙂 Yes, hyper-sensitised “Tech Pan” was the go. One of my friends over here in Australia, Michael Sidonio, was a pioneer of the cold camera along with Prof. David Malin back in the early 80’s. Great stuff – but very difficult and messy, as you say. Modern CCD cameras are cooled to around -50 deg C delta T, and suffer from thermal noise far, far less than a DSLR or mirrorless. I actually have a cooled CCD that offers around 150,000 ISO and produces so little noise because it runs, during my winter, at around -60 deg C. Wonderful stuff – but a world of pain in terms of learning curves. Great fun 🙂
Great work Chris and thanks for sharing your technique
Thanks for this great article! It’s nice to have a break from the gear review type of article and actually see something that makes me want to get out and take pictures!
Thank you so much for sharing your knowledge! Very interesting article and beautiful shots.
Very cool. I really enjoyed reading about this. Thanks!
Nice pictures!
What device did you use with your RX1 for the long exposures in bulb mode?
Thanks GK 🙂 I used a simple cable release, nothing more. Because it’s so dark out at night, a slight fumble with the cable to release it at the end of the exposure isn’t all that critical. You don’t want to bump the setup, and avoid it if you can, but it isn’t like you’re exposing in bright light where a slight knock is terribly obvious.
Excellent advice.
Thanks for posting.
Wow. Such an incredibly cool article. Thanks for sharing this great tutorial.
This is one of the best articles I have seen. I have not done any astrophotography but I now understand the techniques involved. The “how to” and the images are well worth a bit of study.