Architectural Primer, Part II
By James Klotz
Hello again. I got a lot of great feedback from the last article I wrote on photographing architecture, so I thought a second follow up article was in order. Thanks to all that responded, and I am glad you found it useful. And thanks to Steve for continuing the great work maintaining an awesome site!
In this article, I thought it might be a good place to cover lens choice. I find that with a lot of photographers, there tends to be some misunderstanding when it comes to choosing the right lens. A basic understanding can be a great help when it comes to shooting architecture, so I hope you find this helpful. For the purpose of this article, I intend to keep it pretty simple. Feel free to send me an email, via my website listed below, if you’d like some references for some good books that delve deeper into architectural photography. In addition, I got a few emails from folks wanting to use their rangefinder cameras. While not ideal for this type of photography, it is still possible to use your rangefinder with great results. I specifically choose this topic, as it applies to any camera you have, not just the ones that have a tilt/shift lens.
One of the most common misconceptions I hear a lot is that, when shooting architecture, a wide lens is the only way to go. Often times, a wide lens is necessary to get the entire building into the frame, however, we need to be aware of what the results will be and how this will effect the final photograph. Let’s look at some examples.
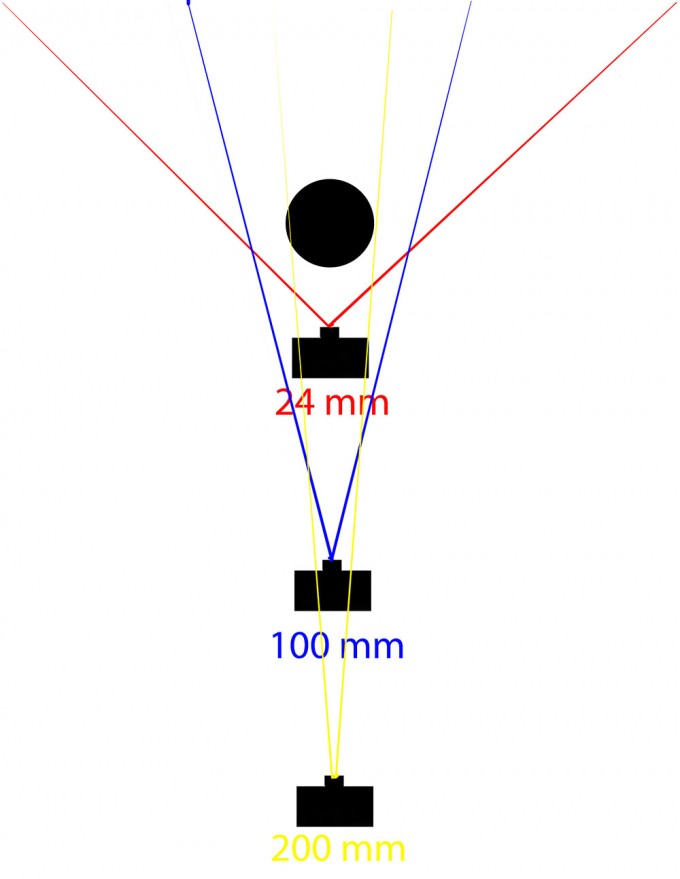
In this (somewhat crude) graphic, we can see that the size of the object we are photographing does not change when we change focal lengths. What does change is 1) the distance we need to be from the subject to make it be the same size and 2) the amount of the background we include in the frame. (we’ll get to the 3rd thing that changes, compression, in a sec) Clearly, if the goal would be to isolate the structure from it’s surroundings, a telephoto lens would show less of it’s surroundings than a wider one.
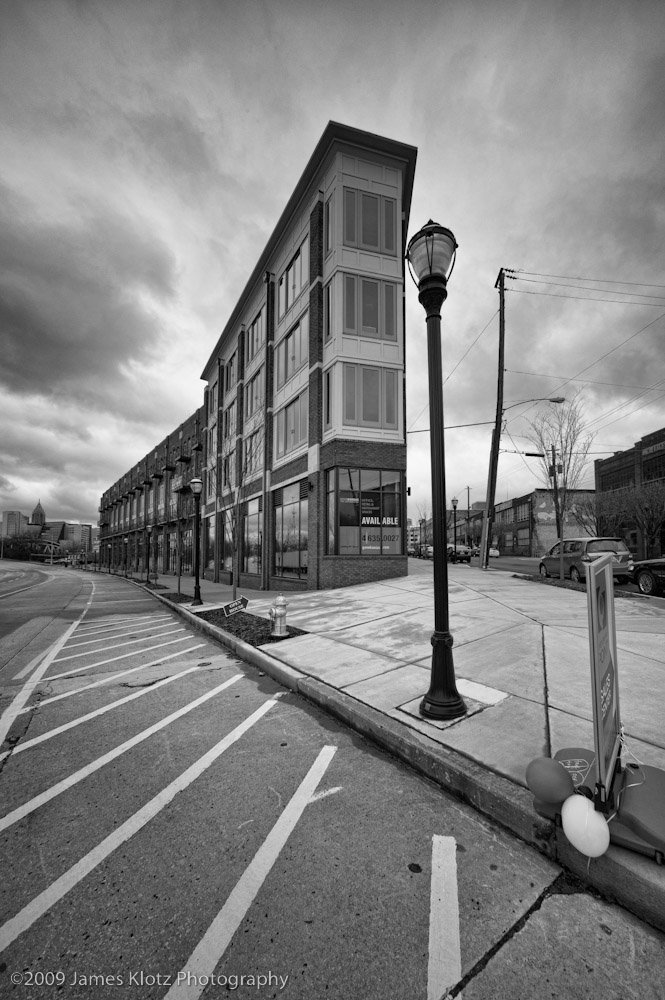
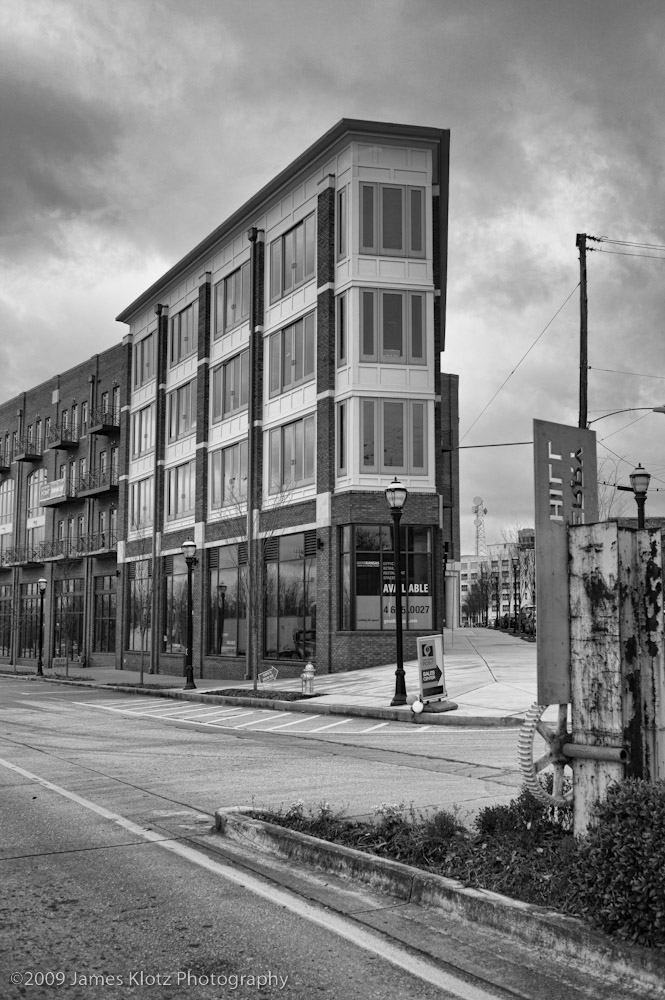
Now, let’s look at it in a real life example. In this series of 3 shots, I took an ordinary building down the street with enough distance to allow me to use a super wide (15mm), a normal lens (50mm) and a telephoto (200mm), using a full frame 35mm camera. I intentionally used extremes in lens choice to exaggerate the effect.
Using the 15mm, I was approximately 15-20 feet in front of the building, standing directly in front of the lamp post. Notice how large the lamp post is in the frame, how the top of the building seems to extrude into the sky, and how much of the surrounding sky and background I am getting.
Next, let’s examine a 50mm (normal) lens. I had to back up about 100 feet to make the building the same size in the frame. Proportionally, the lamp post is now more realistic in relation to the building. Also, there is considerably less of the sky and the surrounding area.
Now, let’s look at the 200mm telephoto. Big difference, huh? I had to back up quite a distance to get it in the frame like that. Notice how everything is compressed into the frame? Where did that big building in the background come from? Why does this flat iron structure now look short and squat? That, my friends, is a prime example of how a telephoto lens compresses everything in the frame.
Having been there, I can tell you with absolute certainty that the 50mm lens produced the most proportionally accurate photograph in relation to the structure. So, does that make it the best focal length for shooting architecture? That all depends on what you want to accomplish. I shoot for a lot of architects, and from their perspective, in this case, yes, the 50mm would have been the best choice. It most accurately documents what the architect designed. Is the wide angle shot more interesting? Possibly (I’ll leave that up to you), however, what is important is to understand the effects of your lens choice and how they relate to what you ultimately are trying to achieve. In addition, you should also be thinking in terms of how much of the background and surrounding areas you intend to include.
That being said, often times we are faced with a structure that has limited access in which to shoot from. If you are shooting a building in an urban environment, you can’t back up any further than the building across the street, for instance. Consequently, we end up having to shoot wider than we would prefer sometimes. As most things in life, it is a trade off. One suggestion is to walk the entire perimeter of the building when faced with such a situation. Often times I can find an angle to shoot from that wasn’t apparent until I walked around the entire structure. Be creative and try several different angles. You might not be able to shoot with your lens you’d prefer, but you can usually find an angle that minimizes the effect of the lens you have to use to get the shot. For tall buildings, try to find a place where you can get up a little, ie. a parking deck or building with an open window. My experience has been that if you can get up to around 1/3rd the height of the building you are shooting, it tends to produce the most natural looking results.
Another important aspect in choosing a lens for shooting architecture is how much barrel or pin cushion distortion a lens has. If a roof line of a structure is straight and level, the last thing we want is the “Mr. Cool Aid” effect in the shot. I teach my students to get their bubble level, place it on the camera, level it and shoot a brick wall or doorway. Being level and plum to the wall is extremely important. In the class, I often use the students cameras and lenses to use as an example. You’d be amazed at how many “professional” lenses exhibit huge amounts of this type of distortion. That doesn’t mean you need to go buy all new lenses, but at least you’d have an idea of how much correction you’re going to need in post to get it right. The 1st step to being able to pre-visualize a shot is knowing your gear and what the shot is going to look like when you get it back home.
So, that, in a nutshell, are some of my basics for lens choice. It only covers focal length and barrel/pin cushion distortion, and there are many other factors to consider – ie, edge sharpness, contrast, vignetting, focus shift, etc., however, focal length will have the greatest effect on the final shot. (notice I didn’t mention bokeh….) So to all those guys who believe only wide and ultra wide lenses should be used to shoot architecture, I say myth busted.
James Klotz is a professional architectural photographer based in Atlanta, GA. He also teaches architectural photography at the Creative Circus. For more information about James, please see his website www.jamesklotz.com
[ad#Adsense Blog Sq Embed Image]




Hello James! I thank you for this old post. I am going into architectural photography as my speciality and reconfiguring my equipment. I have the know how beig an architect and artist however now it’s time to get out there and practice to get better. If will search social media & your website to connect with you. Thanks again!
Great article James, I love the stretched perspective and cloud rendition of the 15 mm shot.
Great article. I like the example of the same building shot with three different lenses. Really highlights the difference a lens can make, even if the image is basically framed the same way.
Thanks guys, I appreciate the comments. Glad you found it useful. Chris, I also appreciate your input. Unfortunately, that was as close as I could get, being that I live in an urban environment, and there were limitations in where I was able to shoot from. I do, however, respectfully disagree. Although the photographs are somewhat crude, I believe they do show the differences between the focal lengths and their effects on the building.
“Why does this flat iron structure now look short and squat? That, my friends, is a prime example of how a telephoto lens compresses everything in the frame.”
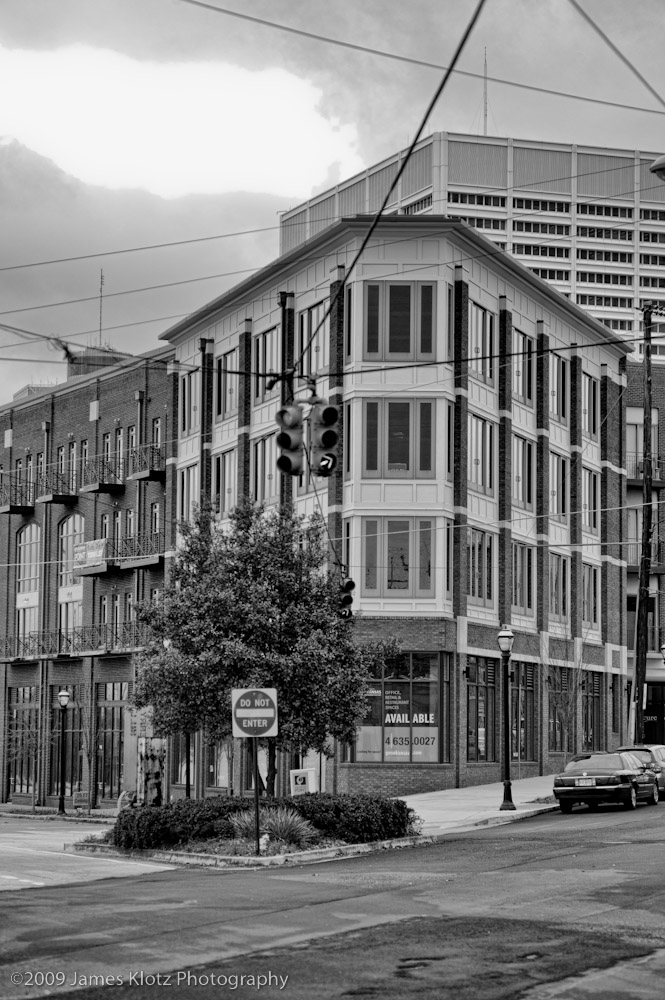
well, unfortunately you didn’t back up in a straight line. the main visual difference between the first two pictures and the third picture isn’t the lens, it’s because you moved considerably to picture right (changing both perspective and the sensor plane in relation to the subject in the process). i am sure you know this, but it’s unfortunate because it takes what could have been a great example and ruins it by making it completely in-comparable. (it could serve as a good object lesson in how choice of angle/perspective in conjunction with lens can make a one building look like many, though.)
you could, for example, have begun at the point where you took the 200mm photo, then walked in a straight line towards the ‘available’ sign and taken your 50mm, and then your 15mm photo. if you had, then the “short and squat” effect would be very different.
it’s a shame, because the basic advice you’re giving is of course spot on–it’s just that in combination with those particular photos as examples, it’s misleading.
Nice article. Love the three shots to show the difference between focal length!
excellent and informative post, as usual!
Choosing between “real” view or exaggerated perspective is a matter of personal vision. i used a 28mm, then skip to a 18mm. you made me think to buy an 50mm now 🙂
Very good article!
Y
Many, many thanks! Taking photos of architecture, in a far more amateurish way than you do, is something I enjoy a lot, and this post was instructive and inspiring.
Thank you again!
Nice post. Keep it coming!